You have a website ready to share. Pixel advertising gives it a visual introduction: an image on a shared canvas that people can open to explore your project.
I built LatticeSpot around that format. A project gets a canvas placement and a public page where visitors can read its story and follow its website link. The canvas can change as new placements arrive; earlier pages keep their original image and record.
Here is how the format works, how it differs from tracking pixels, and what I would prepare before choosing a spot.
What Is Pixel Advertising?
Pixel advertising promotes a website through an image placed in an area of a shared web page. A visitor can select the image to reach the advertiser's website or a page that introduces it. The area is measured in pixels, which determine how much space the placement occupies.
The Million Dollar Homepage is a well-known example of this visual format. On LatticeSpot, the placement page adds room for an introduction. Your image can stay simple while the page explains what your project does and where to try it.
Give a Small Project a Visual Introduction
I would consider a canvas placement when a project has a working destination and an image people can recognize. A small software tool might use its product mark. A designer might choose a distinctive piece from a portfolio. These are preparation examples, rather than customer results.
Choose the action you want someone to take after opening the page. That could be trying a demo, browsing a collection, or sending an enquiry. This decision helps you choose the image and introduction together.
If you are still comparing channels, my free website promotion sites guide covers directories, launch events, and communities alongside LatticeSpot.
Pixel Advertising and Tracking Pixels Serve Different Jobs
The word “pixel” also appears in advertising measurement. Viant's explanation of advertising pixels describes code used to collect information about website activity and conversions. Here is how that differs from choosing space on a canvas.
| Question | Canvas placement | Tracking pixel |
|---|---|---|
| What is it? | A visible image in a shared display area. | Code used to record website activity. |
| What do you prepare? | An image, a destination, and an introduction where supported. | A tracking setup and the events you want to measure. |
| What job does it serve? | Introduce a project to people browsing the canvas. | Help measure visits or actions associated with advertising. |
This guide covers preparing a visible placement. For conversion tracking, use the documentation for your analytics or advertising provider.
How a Canvas Image Leads to Your Website
A placement begins with an image and a selected area on the canvas. The image catches attention; the public page gives the project room to explain itself. Visitors can open that page to see the original image, read the introduction, and follow the website link.
Choose an image that communicates at the size you will actually use. A clear logo or a simple visual can work better in a tiny area than a complete homepage screenshot. Put the fuller explanation on the placement page and keep the next action easy to find.
Keep Your Story Accessible as the Canvas Changes
The canvas is a shared display. A later published placement can overlap an earlier one and replace the overlapping part. The earlier placement’s public page remains available with its original image, introduction, and placement history.
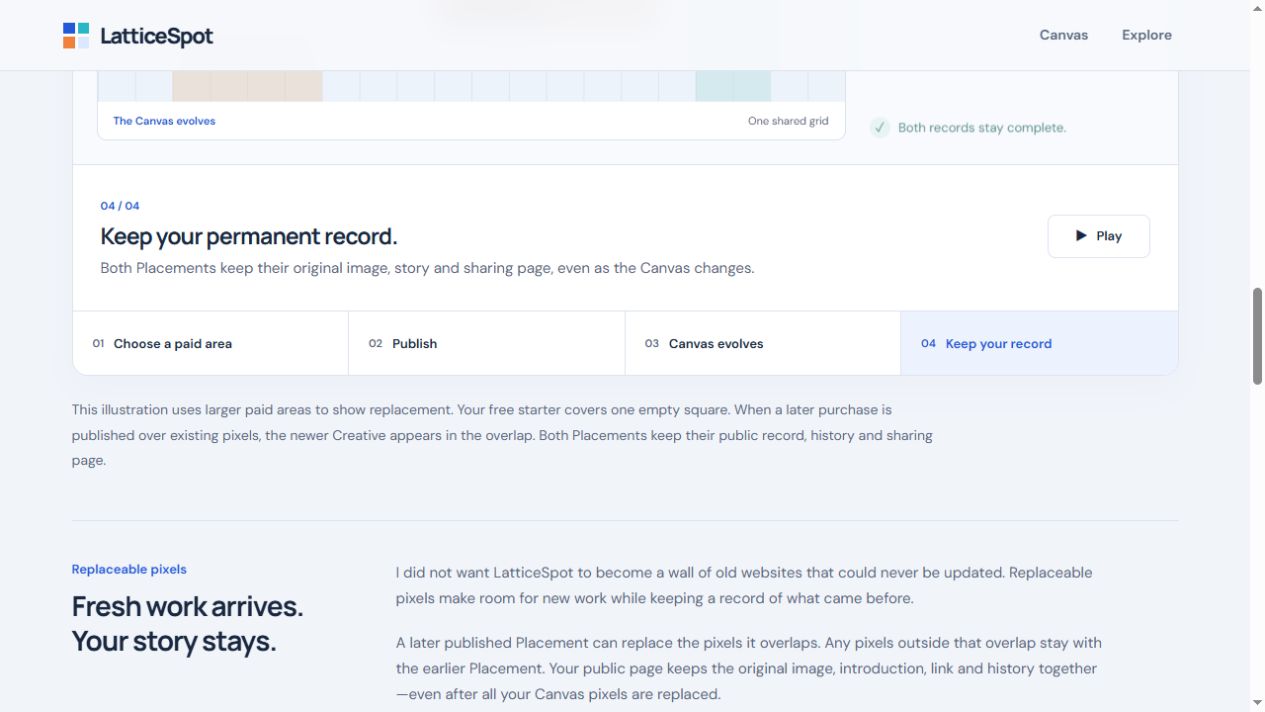
This distinction is the core of the product. The position gives an image a place in the current canvas; the record gives someone a page they can revisit. I want the next project to be able to enter without making the previous project’s story disappear.
For your own promotion, use that public page as a specific destination when it helps explain the placement. Add a concise introduction so it still makes sense to someone who encounters it after the canvas has changed.
Prepare Your First Pixel Advertising Placement
Choose an Area That Fits Your Image
LatticeSpot has a free pixel option for an empty spot on the canvas. It gives you a small way to introduce your project and see the placement process. For a larger image, the paid flow lets you choose an area and preview the total before proceeding.
The free option is one empty pixel per account, with a verified email. Paid pricing depends on the selected area and whether pixels are open or occupied. Review the displayed total and current placement rules before submitting.
The size decision is visual as well as financial. Look at your image in the selected area. If you cannot recognize it at that scale, simplify the artwork or choose an area that gives the important detail more room. A larger area is useful when it makes the message clearer.
Write an Introduction with a Clear Next Step
Write for someone meeting the project for the first time. Name what it does, who it is for, and what they can try. Use a working destination that continues the same story. A visitor who opens a project about a specific tool should reach a page where that tool is easy to find.
For example, a hypothetical illustration portfolio might use one recognizable piece on the canvas, then explain the style and link to the full collection on its placement page. A software project might use its product mark and describe one practical task the visitor can complete.
My startup submission checklist uses the same building blocks: a clear introduction, an actual image, and a useful destination.
Check the Published Page
After publication, open your placement page on a phone. Check that the image is recognizable, the introduction reads clearly, and the website link reaches the intended destination. Save the public URL and publication date with your promotion records.
Check What Happens After Your Placement Goes Live
Before sharing the page, choose a next action to observe. That could be opening your portfolio, trying a demo, or making an enquiry. Use the measurement tools available on your own website to understand what happens after arrival, and keep the promotion source labeled consistently where possible.
| Check | What it tells you | Where to look |
|---|---|---|
| Public placement page | Your introduction is available to open and share. | Open the published URL and check its contents. |
| Referral visits | People reached your website from the placement. | Your website analytics, where the source is recorded. |
| Useful actions | Visitors took the next step you chose. | Your configured events or enquiry records. |
Use the tools you have available. If you cannot measure referral visits yet, record the published page and any enquiries you can verify.
A public listing, a referral visit, and a completed action answer different questions. Treat them separately when deciding what to improve. The promotion measurement guide explains that distinction in more detail.
Published placements follow the platform’s content rules. Outgoing website links use sponsored/nofollow attributes. Canvas visibility, search indexing, and referral visits are separate from the retained placement record.
If you are still choosing your first channel, compare LatticeSpot with the other options in my free website promotion sites guide. If the visual format fits your project, prepare one clear image and give its page a story worth opening.
Give Your Website a Place on the Canvas
Put your image on the canvas and introduce your project with a public placement page. Start with a free pixel application.
Find Your Spot on the Canvas →One free empty pixel per account, with a verified email. Canvas positions can change; earlier public placement records remain accessible. See how placements work.